Crank
Cotter Press $69
As of 11/10/25, We have a 1 year supply on hand.

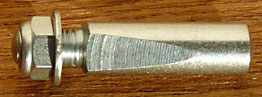
Crank Cotters
Including Raleigh and Peugeot Compatible
When
emailing about cotter presses, please include "Cotter
Press" in
your subject line.
$12
S&H for the Press or Press & Fixed Cup Tool. (In
the USA)
Everywhere
else, please read International
sales & shipping
Click
here for domestic ordering, payment and shipping info
MN
residents; I'll need your 9 digit Zip+4 to calculate sales tax.
No additional S&H charge for Cotters, when mailed with
Cotter Press and/or Fixed Cup tool.
Cotters
installed with a press are much less likely to loosen up than
those installed by just tapping with a hammer and tightening the
nut on the cotter threads.
Removing with a press is much less likely to damage your cranks, or your bearings, than using a hammer. And you are far more likely to be able to reuse your existing cotters. (See Caveat below right.)
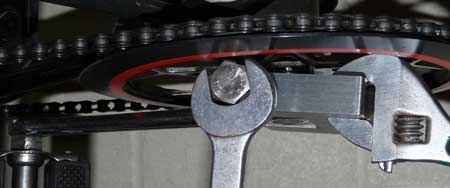
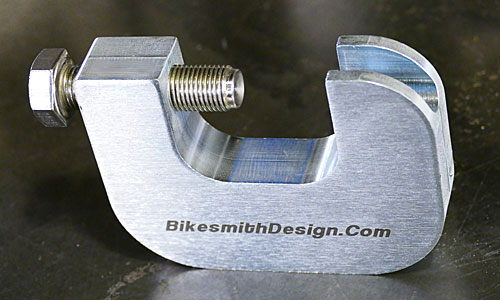
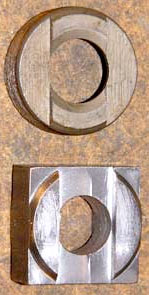
New "Deep Throat" design allows you to orient the press in line with the crank arm for removal of cotters. Holding the tool inline with the arm allows the cupped bolt end to center itself on the offset center of the threaded stem of the cotter.
Presses are machined from oil finished, cold rolled 1018 steel. The stainless steel bolts are 1/2" x 20tpi for durability and so either 3/4" or 19mm wrenches will work on the hex.
If you are working on old English bikes, or cheap Big Box
store bikes like Magnas, for $20 you may also be interested in
this Fixed Cup
Tool.
It fits those hard to remove BB cups with shallow
5/8" flats, such as found on English 3 speeds. More....
When they are used every day, such as in some "Community" bike shops, the threads in the body can eventually wear out. Out of over 2,000 sold, I've heard of 7 instances of this happening. I looked into having the bodies made of 4140 steel. But the price would double, putting the presses out of reach for most home mechanics.